


Water damage affects over 14,000 Americans daily according to industry reports. A properly caulked bathroom sink prevents leaks and extends the life of your fixtures. This guide will show you how to caulk a bathroom sink seamlessly with professional results. You will learn the tools, techniques, and tips to achieve a watertight seal. Follow these steps to keep your bathroom looking fresh and functioning perfectly.
Why Caulking Your Bathroom Sink Matters
Caulking creates a barrier that stops water from seeping into cracks. This prevents mold growth and structural damage over time. A well-sealed sink also looks cleaner and more polished. Additionally, it reduces the risk of costly repairs due to water infiltration. Proper caulking is essential for maintaining a healthy bathroom environment.
Old or cracked caulk can harbor bacteria and mildew. Replacing it improves hygiene and appearance instantly. It also helps maintain the value of your home. Organize bathroom cabinets to complement your freshly caulked sink. This small task makes a big difference in your bathroom’s overall look.
Tools and Materials You Will Need
Gather a caulk gun for precise application of the sealant. Choose a high-quality silicone or latex caulk designed for bathrooms. You will also need a utility knife to remove old caulk. A putty knife helps smooth the new caulk for a professional finish. Keep a damp cloth nearby to clean up excess material quickly.
Use painter’s tape to create clean edges around the sink. This ensures a neat and straight caulk line every time. Rubbing alcohol helps clean the surface before applying new caulk. A caulk remover tool can simplify the process of stripping old sealant. These tools make the job easier and more efficient for beginners and experts alike.
Step-by-Step Guide to Caulking a Bathroom Sink
Step 1: Remove the Old Caulk
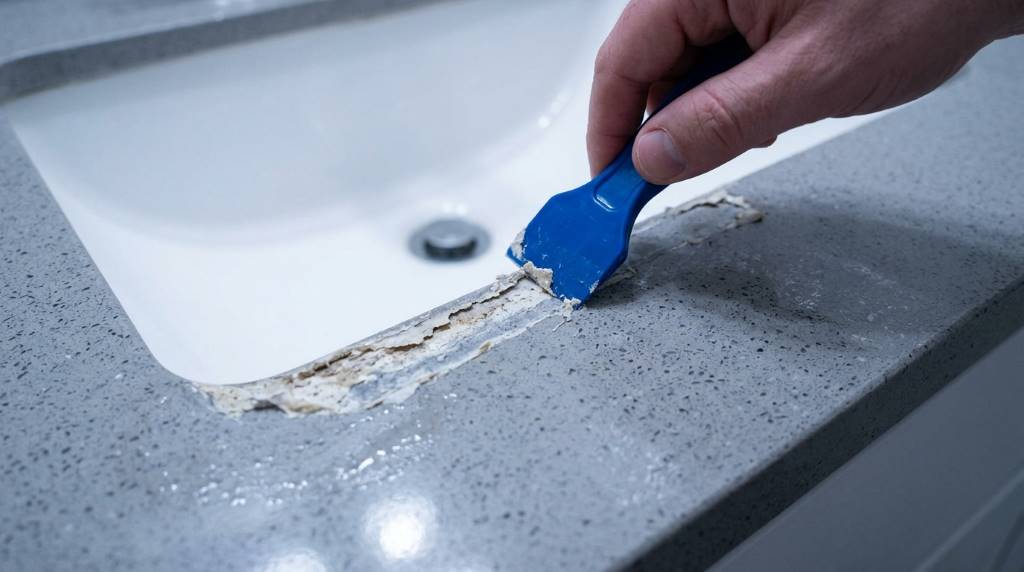
Start by cutting away the old caulk with a utility knife. Be careful not to scratch the sink or countertop surface. Pull out the loose caulk with your fingers or a putty knife. Remove all traces to ensure a smooth new application. This step is crucial for a long-lasting seal.
Use a caulk remover tool for stubborn sections. Soften the caulk with a heat gun if necessary. Clean the area thoroughly with rubbing alcohol to remove residue. A clean surface allows the new caulk to adhere properly. This preparation prevents future peeling or cracking.
Step 2: Clean and Dry the Surface
Wipe down the area with a damp cloth to remove dust and debris. Dry the surface completely before applying new caulk. Any moisture left behind can prevent proper adhesion. Use a fan or towel to speed up the drying process. A dry surface ensures the best results for your project.
Check for any remaining caulk or adhesive in the seam. Scrape it away with a putty knife if needed. A smooth and clean surface is key to a seamless finish. This step also helps prevent mold growth under the new caulk. Take your time to do this thoroughly.
Step 3: Apply Painter’s Tape for Clean Edges
Place painter’s tape along both sides of the seam. Leave a small gap for the caulk to fill. This creates a guide for a straight and even line. Press the tape firmly to prevent caulk from bleeding underneath. The tape ensures a professional-looking finish with minimal effort.
Use a level to ensure the tape is straight if needed. This is especially helpful for long seams or visible areas. The tape also makes cleanup easier after application. Remove the tape immediately after smoothing the caulk for the best results. This technique is a game-changer for beginners.
Step 4: Apply the New Caulk
Load the caulk tube into the caulk gun and cut the tip at a 45-degree angle. Puncture the inner seal with a long nail or wire. Apply steady pressure to the gun while moving along the seam. Keep a consistent speed for an even bead of caulk. This ensures full coverage without gaps.
Start at one end and work your way to the other in one continuous motion. Avoid stopping and starting to prevent uneven lines. Fill the seam completely for a watertight seal. If you make a mistake, smooth it out with a damp finger or tool. Practice on a scrap surface if you are new to caulking.
Step 5: Smooth and Shape the Caulk
Dip your finger in water and run it along the caulk line. This smooths the bead and removes excess material. Use a caulk smoothing tool for a more professional finish. Work quickly before the caulk begins to set. This step ensures a seamless and attractive appearance.
Remove the painter’s tape immediately after smoothing. Pull it away at a 45-degree angle for clean edges. Check for any gaps or thin spots and add more caulk if needed. Allow the caulk to dry completely before exposing it to water. Most caulks cure within 24 hours for full effectiveness.
Unique Tips for a Flawless Finish
Use a caulk color that matches your sink or countertop for a seamless look. Clear or white caulk works well for most bathroom designs. For darker surfaces, consider a gray or black caulk. This small detail can make a big difference in the final appearance. Matching the caulk color enhances the overall aesthetic.
Apply caulk in a well-ventilated area to avoid inhaling fumes. Open windows or use a fan to improve airflow. Wear gloves to protect your hands from chemicals and sharp tools. Safety is important even for small projects like this. These precautions ensure a safe and enjoyable experience.
For a cut hole for sink project, caulking is the final step to ensure a watertight installation. Always follow the manufacturer’s instructions for drying times. Avoid using the sink until the caulk is fully cured. This patience prevents water damage and ensures a long-lasting seal.
Consider using a caulk with mold-resistant properties for bathrooms. These products are designed to inhibit mold and mildew growth. They are ideal for high-moisture areas like sinks and showers. Investing in quality caulk saves time and effort in the long run. This choice is especially important for humid climates.
Common Mistakes to Avoid
Avoid applying caulk over dirty or wet surfaces. This prevents proper adhesion and leads to early failure. Always clean and dry the area thoroughly before starting. Skipping this step can result in peeling or cracking caulk. A little preparation goes a long way.
Do not use too much caulk in the seam. A thick bead is harder to smooth and can look messy. Apply just enough to fill the gap completely. Excess caulk can also take longer to dry and may not cure properly. Less is often more when it comes to caulking.
Never rush the drying process by using the sink too soon. Water exposure can ruin the caulk before it cures. Follow the manufacturer’s recommended drying time closely. Patience ensures a durable and effective seal. This step is critical for long-term success.
Do not forget to remove the painter’s tape before the caulk dries. Leaving it on too long can cause the caulk to peel when removed. Check the caulk line for gaps or thin spots after smoothing. Touch up any problem areas immediately for the best results. Attention to detail makes all the difference.
Maintaining Your Caulked Bathroom Sink
Clean your caulked sink regularly with mild soap and water. Avoid harsh chemicals that can break down the caulk over time. Wipe down the area after each use to prevent water buildup. Regular maintenance extends the life of your caulk and keeps it looking new.
Inspect the caulk every few months for signs of wear or damage. Replace it if you notice cracking, peeling, or discoloration. Addressing issues early prevents water damage and mold growth. A quick touch-up can save you from costly repairs later. Proactive care is key to a long-lasting seal.
For best results, reapply caulk every one to two years as part of your bathroom maintenance. This keeps your sink looking fresh and functioning properly. Use the same color and type of caulk for a consistent appearance. Regular updates ensure your bathroom stays in top condition. This habit is especially important in high-use areas.
If you are unsure about the process, consult a professional for guidance. They can provide tips tailored to your specific sink and bathroom setup. Learning from experts can improve your technique and results. Do not hesitate to ask for help when needed. Let plumbers putty dry properly for related projects.
Conclusion
Caulking a bathroom sink is a simple yet impactful project. It protects your home from water damage and enhances its appearance. With the right tools and techniques, anyone can achieve professional results. Follow this guide to caulk your sink seamlessly and with confidence. Start today and enjoy a fresh and functional bathroom.
Take the time to do the job correctly for long-lasting results. Share your newfound skills with friends and family. A well-maintained bathroom adds value and comfort to your home. Make caulking a regular part of your home maintenance routine. Your future self will thank you for the effort.
FAQ
How often should I replace the caulk around my bathroom sink?
Replace the caulk every one to two years or when it shows signs of wear.
Can I use any type of caulk for my bathroom sink?
Use silicone or latex caulk specifically designed for bathrooms for best results.
How long does it take for caulk to dry completely?
Most caulks cure within 24 hours but check the product instructions for specifics.
What is the best way to remove old caulk?
Use a utility knife and caulk remover tool to strip old caulk safely and effectively.
Do I need to use painter’s tape when caulking?
Painter’s tape helps create clean edges but is optional for experienced users.