


Drywall damage is a common issue for homeowners in the USA. Over 60% of households face this problem annually. Small holes often come from accidents or wear and tear. Fixing them quickly keeps your walls looking fresh and clean. Learning this skill saves time and money on repairs.
Why Fixing Drywall Holes Matters
Ignoring drywall holes can lead to bigger issues over time. Dust and pests may enter through the gaps. Moisture can also seep in and cause mold growth. Fixing holes right away maintains your home’s value. It also improves the appearance of your living space.
A well-maintained wall enhances your home’s overall look. It creates a clean and inviting atmosphere. Minimalist home setup often starts with flawless walls. Small repairs prevent costly renovations later. Addressing damage early keeps your home in top shape.
Tools and Materials You Will Need
Gather the right tools before you start the repair. You will need a utility knife for cutting drywall. A sanding block helps smooth the repaired area. Joint compound and a putty knife are essential for filling holes. A drywall patch or mesh tape reinforces larger holes.
You will also need a screwdriver for securing patches. A measuring tape ensures accurate cuts. Primer and paint match your wall’s finish. A paintbrush or roller applies the final touches. Having everything ready speeds up the process.
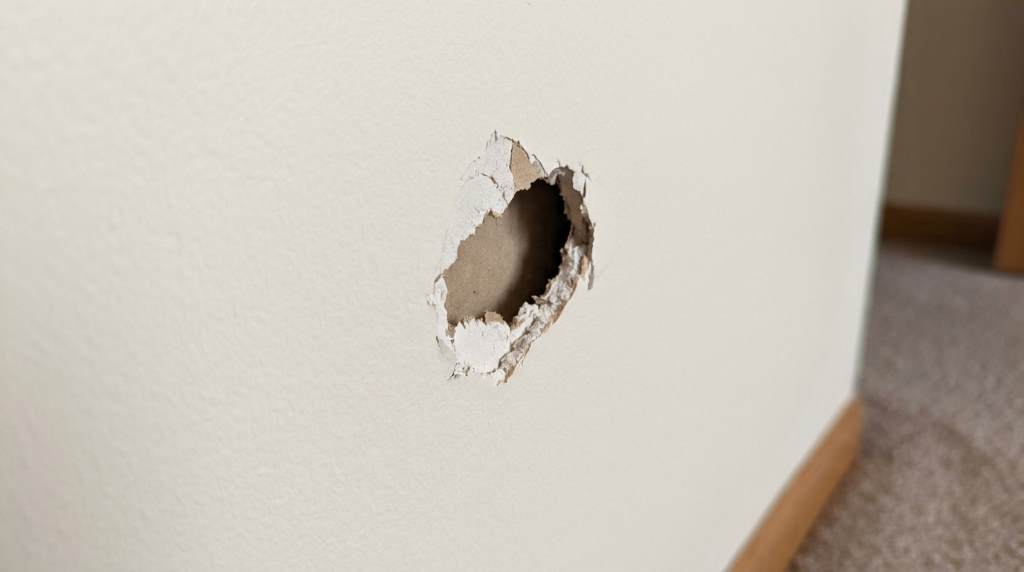
Step-by-Step Guide to Fix Small Holes
Small holes are the easiest to fix. Start by cleaning the area around the hole. Remove loose debris or dust with a damp cloth. This ensures the joint compound adheres properly. Let the area dry completely before proceeding.
Apply joint compound with a putty knife. Fill the hole and smooth the surface. Let it dry for a few hours. Lightly sand the area until it is flush with the wall. Apply a second coat if needed for a seamless finish.
Preparing the Surface
Clean the hole and surrounding area thoroughly. Use a utility knife to trim any frayed edges. This creates a smooth surface for the compound. Wipe away dust with a damp cloth. A clean surface ensures better adhesion.
Prime the area if the drywall is exposed. This step is often overlooked but very important. Priming seals the surface and prevents flaking. It also helps the joint compound bond securely. Skip this step only for very tiny holes.
Applying the Joint Compound
Use a putty knife to apply the joint compound. Press firmly to fill the hole completely. Smooth the surface with the knife’s flat side. Remove excess compound for a clean finish. Let it dry as per the product instructions.
Sand the area lightly after it dries. Use fine-grit sandpaper for a smooth texture. Wipe away dust with a damp cloth. Repeat the process if the hole is still visible. Patience ensures a flawless repair.
Fixing Medium-Sized Holes
Medium holes require a bit more effort. Use a drywall patch or mesh tape for support. Cut a square around the hole with a utility knife. This provides a clean edge for the patch. Remove any loose drywall inside the hole.
Place the patch over the hole and secure it. Use joint compound to cover the patch. Feather the edges to blend with the wall. Let it dry and sand smooth. Apply a second coat for a seamless look.
Cutting the Patch
Measure the hole and cut a patch to fit. Use a piece of drywall or a pre-made patch kit. Score the back of the drywall for a clean break. Test the fit before applying joint compound. A snug fit ensures a strong repair.
Secure the patch with screws or adhesive. Make sure it is flush with the wall. Cover the seams with joint compound. Use a wide putty knife to feather the edges. This hides the patch and blends it with the wall.
Finishing Touches
Let the compound dry completely between coats. Sand lightly between layers for a smooth finish. Apply a final coat if needed. Prime the area before painting. This ensures the paint adheres evenly.
Paint the repaired area to match the wall. Use the same paint color and finish. Blend the edges with a brush or roller. Installing front door often requires similar attention to detail. Step back to check for any visible seams or uneven areas.
Repairing Large Holes
Large holes need a more structured approach. Cut a square or rectangle around the damage. Remove the damaged drywall carefully. Measure and cut a new piece to fit the opening. Secure it with screws into the studs behind the wall.
Cover the seams with joint tape and compound. Apply multiple thin layers for strength. Sand smooth between each layer. Prime and paint to match the existing wall. This method ensures a durable and invisible repair.
Supporting the New Drywall
Locate the studs behind the wall for support. Use a stud finder to mark their positions. Secure the new drywall piece to the studs. This provides a strong foundation for the patch. Use drywall screws for a secure hold.
Apply joint tape over the seams. This prevents cracks from forming later. Cover the tape with joint compound. Feather the edges to blend with the wall. Let each layer dry before sanding and adding the next.
Blending the Repair
Sand the final layer until it is smooth. Wipe away dust with a damp cloth. Apply a coat of primer to seal the surface. Paint the area to match the surrounding wall. Use a roller for large areas and a brush for edges.
Inspect the repair under different lighting. This helps spot any imperfections. Touch up as needed for a flawless finish. Pull down closet rod installations also benefit from this level of precision. A well-blended repair looks as good as new.
Tips for a Professional Finish
Use a wide putty knife for feathering edges. This creates a seamless transition between the repair and wall. Thin the joint compound slightly for easier application. Work in good lighting to spot imperfections early.
Let each layer dry completely before sanding. Rushing this step can lead to a rough finish. Use fine-grit sandpaper for a smooth surface. Wipe away dust between coats for better adhesion.
Common Mistakes to Avoid
Do not over-sand the repaired area. This can create low spots or damage the surrounding wall. Avoid applying too much joint compound at once. Thin layers dry faster and prevent cracking.
Do not skip the priming step. Unprimed joint compound absorbs paint differently. This can make the repair stand out. Always use the same paint color and finish. Test the paint on a small area first.
Maintaining Your Drywall
Regularly inspect your walls for damage. Address small holes and cracks immediately. This prevents them from growing larger over time. Keep your home’s humidity levels in check. Excess moisture can weaken drywall and cause mold.
Use gentle cleaning methods for your walls. Avoid harsh chemicals or abrasive tools. These can damage the paint and drywall surface. Touch up paint as needed to keep walls looking fresh. Proper maintenance extends the life of your drywall.
Conclusion
Fixing a hole in drywall is a simple and rewarding task. With the right tools and techniques, anyone can do it. Follow these steps to achieve a professional finish every time. Start with small repairs to build your confidence and skills.
Do not let drywall damage linger. Take action today to restore your walls. Share this guide with friends or family who need help. Bookmark it for future reference. Your home deserves to look its best.
FAQs
How long does it take to fix a small hole in drywall?
A small hole can be fixed in a few hours including drying time.
Can I use spackle instead of joint compound?
Spackle works for very small holes but joint compound is better for larger repairs.
Do I need to prime the repaired area before painting?
Yes priming ensures the paint adheres evenly and blends with the wall.
What is the best way to blend the repair with the wall?
Feather the edges of the joint compound and use the same paint color.
How do I prevent cracks from forming in the repaired area?
Use joint tape and apply thin layers of compound for strength.